JAMS provides built-in support for all standard file transfer protocols including:
-
FTP: Classic (unencrypted) FTP support that conforms to RFC 959 and 1123.
-
FTPS: SSH File Transfer. Provides encrypted password and data encryption. Defined by RFC 959, 1123, 4217, and 2228.
-
SFTP: FTP over TLS/SSL. Includes encrypted password and data encryption. Considered a more secure protocol over FTPS.
-
SCP: Secure CP. A variant of BSD rcp that transfers files over an SSH session.
The File Transfer Execution Method
JAMS’ File Transfer Execution Method works with all the above protocols using “fill in the blanks” ease of use setups. In addition, this method supports automatic retries and wildcards and includes complete integration with JAMS user security.
Since file transfers execute as standard JAMS Jobs, users have the following capabilities:
-
Automatic notification for failed or stalled transfers or runaway processes.
-
Dependency support before and after the file transfer.
-
File event triggering for file transfers.
-
Direct integration into a JAMS Setup for process sequencing and flow control.
Defining a New Job using the File Transfer Execution Method
To define a Job utilizing the File Transfer Execution Method, follow the steps below.
-
First, activate the Jobs View and click within the Definitions Group on the Shortcut Bar.

-
Choose the green Add button on the Ribbon Bar to initiate the JAMS Job Definition Wizard.
-
Select Next to open the wizard's Jobs Name page. Enter a unique name for the new Job along with an optional description. Click the Next button.
-
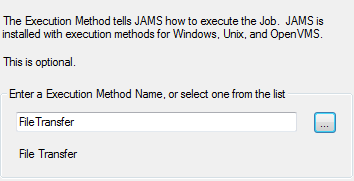
The Execution Method page follows. Click the File Browser button to open the Execution Method Search list. Navigate to and double-click the File Transfer option. This action closes the search window and populates the Execution Method field. Select Next.
-
On the Notification Email Addresses page enter one or more address to alert specific staff if a Job fails or doesn’t complete within an allotted time. Click the Next button.
-
On the following page, verify the user account for this Job using the dropdown list or by entering a valid username and password. Click the Next button.
-
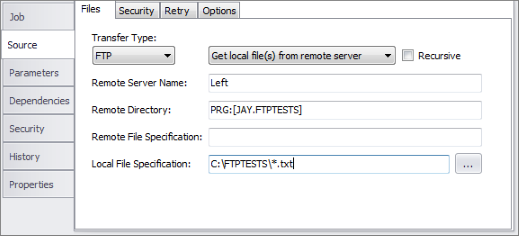
The Source page opens with a “fill in the blanks” form to define the file transfer properties.
![]()
Use the descriptions below as a guide through the four associated Source page tabs.
File
Remote Server Name
Enter the DNS name or IP address of the remote server.
Remote Directory
Provide the default working directory on the selected remote server.
Remote File Specification
Insert the remote file specification. When left black, the filename and extension of the local file is substituted. This field also allows wildcards.
Local File Specification
Enter or navigate to the file specification for the local file. This field also allows wildcards.
Security
User Security
Select a predefined JAMS User Security object to access the remote server.
Username and Password
Enter a user name and password to access the remote server.
Retry
Maximum Retries
Include the maximum number of retry attempts if the transfer fails.
Retry Delay
This property defines the delay (in minutes) between retries.
Options
The fields shown on the Options tab may vary based upon the selected transfer type.
![]()
Port
Enter the TCP/IP port the selected server is using.
Passive
When checked, passive mode is enabled. In this mode, TCP/IP connections are always made from the client to the server, which makes it easier to support NAT and firewalls.
Binary
When enabled, a binary transfer is performed.
Keep Alive
When checked, JAMS continues to ping in order to maintain the connection.
Keep Alive Interval
This property defines the time between JAMS ping messaging.
-
Select the Next button to advance to the Schedule page. Use the Schedule Date dropdown to create a built in schedule or manually enter a single or multiple date specification. Click Next.
-
Choose the Finish button to complete the Job definition
Modifying an Existing File Transfer Job
-
To make changes to an existing file transfer Job, open its properties window by right clicking (or double-clicking) the desired Job listing.
-
From the Job’s context menu select the Properties command.
-
The Job’s Properties window appears. Select the Source tab and make any desired modifications. Notice, these are the same entry fields and configurations described in step 7 of the previous section.
- If required, make any other modifications to this Job by accessing the other tabs within the Properties window.
- When completed, close the Properties window and save and confirm your changes.