Users must define and enter specific attributes in order to successfully run a job in JAMS.
Once a job has been properly defined it can either:
-
Be submitted to run on demand or . . .
-
Set up to run automatically using a schedule.
 |
Note: A single JAMS Job can execute many other jobs. A schedule can exist on different machines to allow for separate management tasks and eliminate single points of failure. |
Creating a New Folder
The first step is to create a new folder or alternatively use an existing folder directory to locate similar JAMS jobs.
|
Note: Creating new or using existing folders in JAMS is optional. |
To create a new JAMS definitions folder follow the steps below:
-
In the JAMS Definitions list on the Shortcut Bar right-click the root folder and choose the Add Folder command.

-
This action opens the JAMS Folder Definition Wizard. With the wizard open, simply follow the steps to specify a new folder name. If required, include any notification parameters for that folder. Click the Finish button to add the new folder to the Definitions Navigator list.
Adding a new Dynamics AX Job using the JAMS Definition Wizard
After creating a folder, you can quickly set up a Dynamics AX job using the JAMS Job Definition Wizard.
Follow the steps below to create and define a JAMS/AX job:
- From the new or an existing folder, click the cursor within the larger Job list window to activate the green Add button on the Ribbon Bar.
- Select the Add button to open the JAMS Job Definition Wizard’s opening screen. Click the Next button to access the Job Name screen. Enter a unique job name and job description and click the Next button.
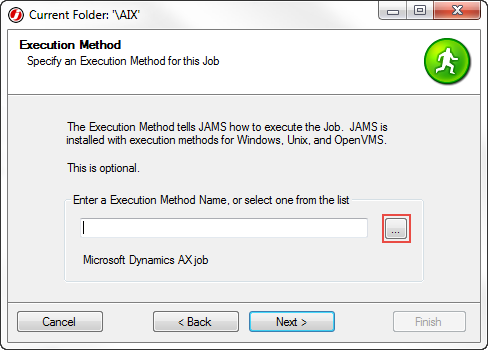
- The Job Execution Method screen opens. Select the File Browser button located to the right of the field name.
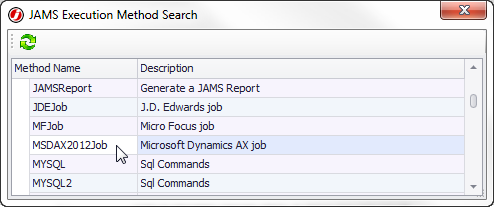
- The JAMs Execution Method Search screen opens. Double-click the AX Execution method from the list.
- The Execution Method screen returns, displaying the selected method.
- Click Next to open the Notification E-mail Addresses page. If required, specify any user email address(es) that should receive job notifications when problems occurs.
- Choose the Next button to move to the verify user account wizard screen. Use the pull down to select the user account to be associated with this [AX] job.
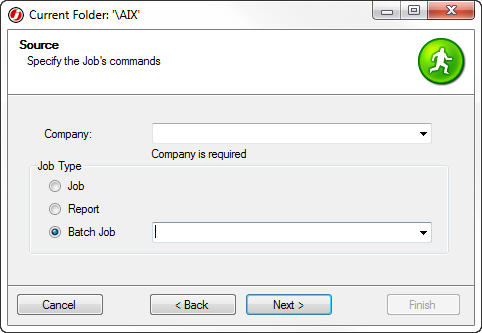
- Click Next to move to the Source wizard screen. Enter the appropriate values.
Company: Select the AX company ID for this job.
Job Type: Choose the appropriate radio button.
Job: Choose from a list of defined jobs in the AX AOT
Report: Select from a list of reports that are on an AX menu. This type of job can have many defined parameters. Refer to the topic: Report Job Type Specific Parameters.
Batch Job: Choose from the list of batch Jobs (by name) that have been created in AX. A batch job contains all the pertinent information to execute on its own.
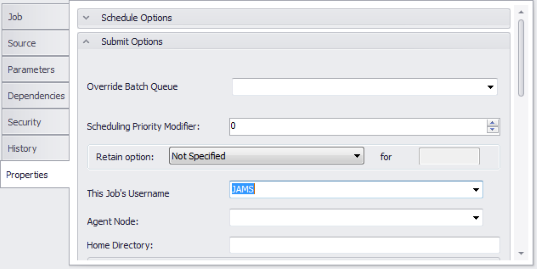
Once the AX Job has been created, open its Job definitions, select the Properties tab, and choose the Submit Options section. Select a Username from the dropdown list, and then close out of the Job Definitions window.