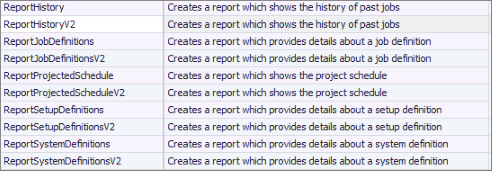
JAMS includes a variety of built-in Jobs that produce common reports. For example, the ReportCurrentScheduleV2 Job (located in the JAMS Folder) generates a report that displays all currently defined Jobs. The ReportHistoryV2 Job generates a report showing all past Jobs. To integrate these and automate other built-in JAMS Report Jobs, follow the example below.
Setting Up the Report Job Properties
To get started, select a default Report Job and open and modify its properties.
- Select the JAMS tab on the Ribbon Bar and highlight the JAMS directory in the Definitions Group on the Shortcut Bar.
- Highlight the Jobs Shortcut at the bottom of the JAMS Client window to display a listing of the Job definitions on your local system or selected server.
.png)
- In this example, locate and double-click the built-in Job, ReportHistoryV2 located in the JAMS folder on the Shortcut Bar's Definitions Group.
- Choose the Properties tab and then expand the Source Options category from the tree view.
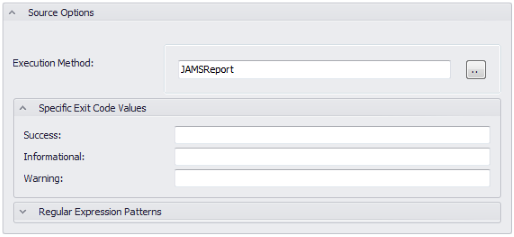
- Notice the Execution Method property is set to JAMSReport. This is a built-in execution method that generates report documents attached to a JAMS Job.
To change the execution method, click the File browser button to the right of the property and make a selection from the Execution Method Search list.
-
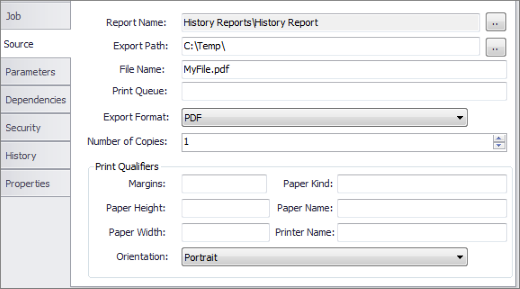
Next, choose the Source tab in the Job Definition window. This screen allows you to set the report generated by this Job.
-
From the above screen, modify the default properties for this report. For example:
- Use the File Browser button to set the Export Path.
- Modify the File Name property to determine where to save the report’s output file.
- Use the Print Queue property to enter either a printer name to output the report or a list of email addresses to send the report. Use commas or semi-colons to separate multiple recipients.
 |
Note: If the Print Queue property contains an email address you don't need to supply an export path. |
|
Note: If both the File Name and Print Queue properties are populated, the generated report is saved and forwarded to the designated recipient or group of recipients. However, if either field is left blank the default printer is used. |
-
Use the Export Format dropdown to define a file format for the report. The supported formats include: PDF, HTML, MHT, CSV, RTF, Text, XLSX (Excel) or Print.
|
Note: Entering “Print” instead of specifying a file format immediately sends the report output directly to the default printer. |
-
The Print Qualifiers are used to setup the report only if the Export Format is set to the Print option. Use the descriptions below to define each parameter.
- Margins: defines the margins of a report page (measured in hundredths of an inch). When setting this property, the value should be entered as “Left,Right,Top,Bottom”. For example, a 1” top and bottom with .75” side margins would be entered as “75,75,100,100”.
- Paper Height and Paper Width properties: define the height and width of the report page, measured in hundredths of an inch. This property can be enabled only if Paper Kind is set to Custom.
- Paper Kind: Determines the type of paper for the report. If this is set to Custom, the printer paper is selected according to the property's value, and its size is set to the Page Height and Page Width Paper Name property values.
- Paper Name: Sets the name of the custom paper which is used in the output printer. This can only be set if the Paper Kind is set to Custom.
- Printer Name: defines the printer to use for outputting the report.
- Orientation: Sets a value for the page orientation - landscape or portrait.
- Once the above properties have been modified, choose the Save and Close (the green checkmark button) to return to the Job Definitions View.
Submitting the Report
-
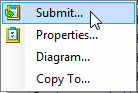
From the Job Definitions list, right-click the modified Report Job ReportHistoryV2. From the pop-up context menu, choose the Submit command.
-
The Submit dialog opens. Select the Parameters tab and make any final changes to the Report’s time range definitions and other listed settings.
-
Choose the Reports tab to view the override options for the report settings. For example, both the Print Queue and Print Form properties can override their default values.
-
All built-in Report Jobs can be manually submitted or scheduled. To define a schedule, select the Schedule tab and enter a start time.
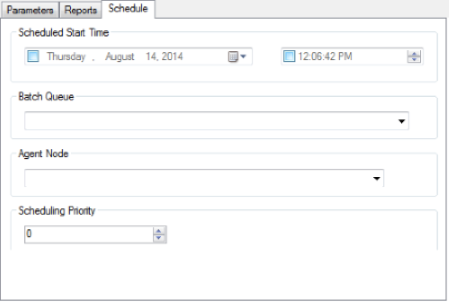
|
Note: a Job schedule can also be set by opening the Job definitions Properties tab and choosing Schedule Options from the tree view. |
-
After making the changes on the Submit dialog, click the Submit Run Request button to run the Job.